Samsung Thin Client Network Configuration
From Longview ISD Technology Wiki
(Difference between revisions)
(Created page with 'Click the word OPTIONS in the upper left corner of the screen. <br> Thin Client Options Menu Choose CONFIGURATION. Under Configuration a windo…') |
|||
| (6 intermediate revisions not shown) | |||
| Line 1: | Line 1: | ||
| - | Click the word OPTIONS in the upper left corner of the screen. | + | Click the word '''OPTIONS''' in the upper left corner of the screen. |
<br> | <br> | ||
[[File:ThinClientOptions.jpg|75px|Thin Client Options Menu]] | [[File:ThinClientOptions.jpg|75px|Thin Client Options Menu]] | ||
| - | Choose CONFIGURATION. | + | Choose '''CONFIGURATION'''. |
Under Configuration a window will come up which will have several tabs across the top. | Under Configuration a window will come up which will have several tabs across the top. | ||
| Line 9: | Line 9: | ||
Important: if you need to make any changes in the configuration you will need to Reset or Restart the computer. Do whatever it says to do. | Important: if you need to make any changes in the configuration you will need to Reset or Restart the computer. Do whatever it says to do. | ||
| - | + | ====Setting for Network Tab ==== | |
[[File:ThinClientNetworkConfig.jpg|200px|Thin Client Network Tab]] | [[File:ThinClientNetworkConfig.jpg|200px|Thin Client Network Tab]] | ||
| - | + | * Enable DHCP: Check. | |
| - | + | * IP Address: Will vary. Example: 10.8.4.245 | |
| - | + | * Subnet Mask: 255.255.0.0 | |
| - | + | * Gateway: Will vary. Example: 10.8.0.1 | |
| - | + | * Primary DNS Server: 10.40.7.2 | |
| - | + | * Secondary DNS Server: 10.40.7.6 | |
| - | + | * Domain Name: lisd.org | |
| - | + | * FQDN: blank | |
| - | + | * Ethernet Mode: Auto | |
| - | + | ==== Settings for VMWare Tab ==== | |
| - | + | ||
[[File:ThinClientVMWareConfig.jpg|200px|Thin Client VMWare Tab]] | [[File:ThinClientVMWareConfig.jpg|200px|Thin Client VMWare Tab]] | ||
| - | + | * Enable VMware View: | |
| - | + | * Identity connection Server by: FQDN | |
| - | + | * Connection Server FQDN: nemesis.lisd.org | |
| - | + | * Port: leave blank | |
| - | + | * SSL: no check | |
| - | + | * Auto connect: check | |
| + | ==== Settings for Discovery Tab ==== | ||
| + | [[File:ThinClientDiscoveryTab.jpg|200px|Thin Client Discovery Tab]] | ||
| + | *Enable Discovery: check | ||
| + | *Enable Host discovery: check | ||
| - | + | [[Virtual Computer/Thin Client FAQs]] | |
| - | [[ | + | |
| - | + | ||
| - | + | ||
| - | + | ||
| - | + | ||
| - | + | ||
| - | + | ||
| - | + | ||
Current revision as of 19:51, 18 January 2013
Click the word OPTIONS in the upper left corner of the screen.
 Choose CONFIGURATION. Under Configuration a window will come up which will have several tabs across the top.
Main tabs to check for configuration: Network Tab, VMWare View Tab, Discovery Tab
Important: if you need to make any changes in the configuration you will need to Reset or Restart the computer. Do whatever it says to do.
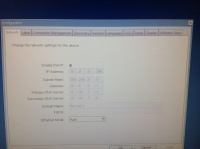
Setting for Network Tab
- Enable DHCP: Check.
- IP Address: Will vary. Example: 10.8.4.245
- Subnet Mask: 255.255.0.0
- Gateway: Will vary. Example: 10.8.0.1
- Primary DNS Server: 10.40.7.2
- Secondary DNS Server: 10.40.7.6
- Domain Name: lisd.org
- FQDN: blank
- Ethernet Mode: Auto
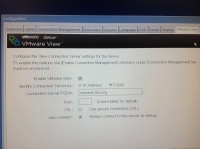
Settings for VMWare Tab
- Enable VMware View:
- Identity connection Server by: FQDN
- Connection Server FQDN: nemesis.lisd.org
- Port: leave blank
- SSL: no check
- Auto connect: check
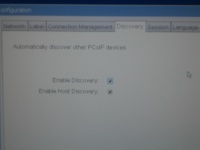
Settings for Discovery Tab
- Enable Discovery: check
- Enable Host discovery: check


