Advanced Features
From Longview ISD Technology Wiki
(Difference between revisions)
Lferguson (Talk | contribs)
(Created page with '== Edit Pictures== ==== General Editing Tools ==== In the '''Import and Arrange Your Pictures''' title section, note the editing tools found below the preview screen. :::[[File…')
Newer edit →
(Created page with '== Edit Pictures== ==== General Editing Tools ==== In the '''Import and Arrange Your Pictures''' title section, note the editing tools found below the preview screen. :::[[File…')
Newer edit →
Revision as of 16:12, 21 February 2013
Contents |
Edit Pictures
General Editing Tools
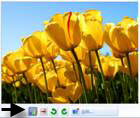
In the Import and Arrange Your Pictures title section, note the editing tools found below the preview screen.
Correcting Color Levels
- 1. Click the Correct Color Levels button.
- 2. Note that the Correct Color Levels is now blue. It is now on for this picture.
- 3. If you like how the picture now appears, leave the button on.
- 4. If you don’t like how the picture appears, click the button again to turn it off.
Correcting Red Eye
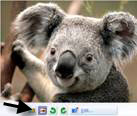
- 1. Click the picture on the timeline where you need to correct red eye.
- 2. Click the Correct Red Eye button.
- 3. Note that the Correct Red Eye button is now blue. The tool is now turned on.
- 4. If you like how the picture now appears, leave the button on.
- 5. If you don’t like how the picture appears, click the button again to turn it off.
Rotating Images
- 1. Photo Story 3 works best with images taken in a landscape mode.
- 2. Click Rotate or Rotate Clockwise to correct orientation of image.
Editing Images
- 1. Click the Edit button to make other changes your images.
- 2. Rotate and Crop
- 3. Auto Fix
- a. Correct Contrast
- b. Correct Color Levels
- c. Correct Red Eye
- 4. Add Effect
- 5. Click the green Clockwise or Counterclockwise arrow to change the orientation of the image.
- 6. Under the Auto Fix tab, click the radio button beside the different auto fixes to turn the corrections on or off.
Adding Effects
- 1. Click the Add Effect tab.
- 2. Click the black arrow to the right of effect to see the possible effects.
- 3. Click the effect you want to use.
- 4. Select Apply the selected effect to all of the pictures in your story if you want that effect on every slide.
- 5. Click Save.
- 6. If you are using a different effect on each slide, click Save after you change the effect on each slide.
- 7. Use the arrows to navigate to different slides.
- 8. Click Save Project to save all your editing changes to the project file.


